
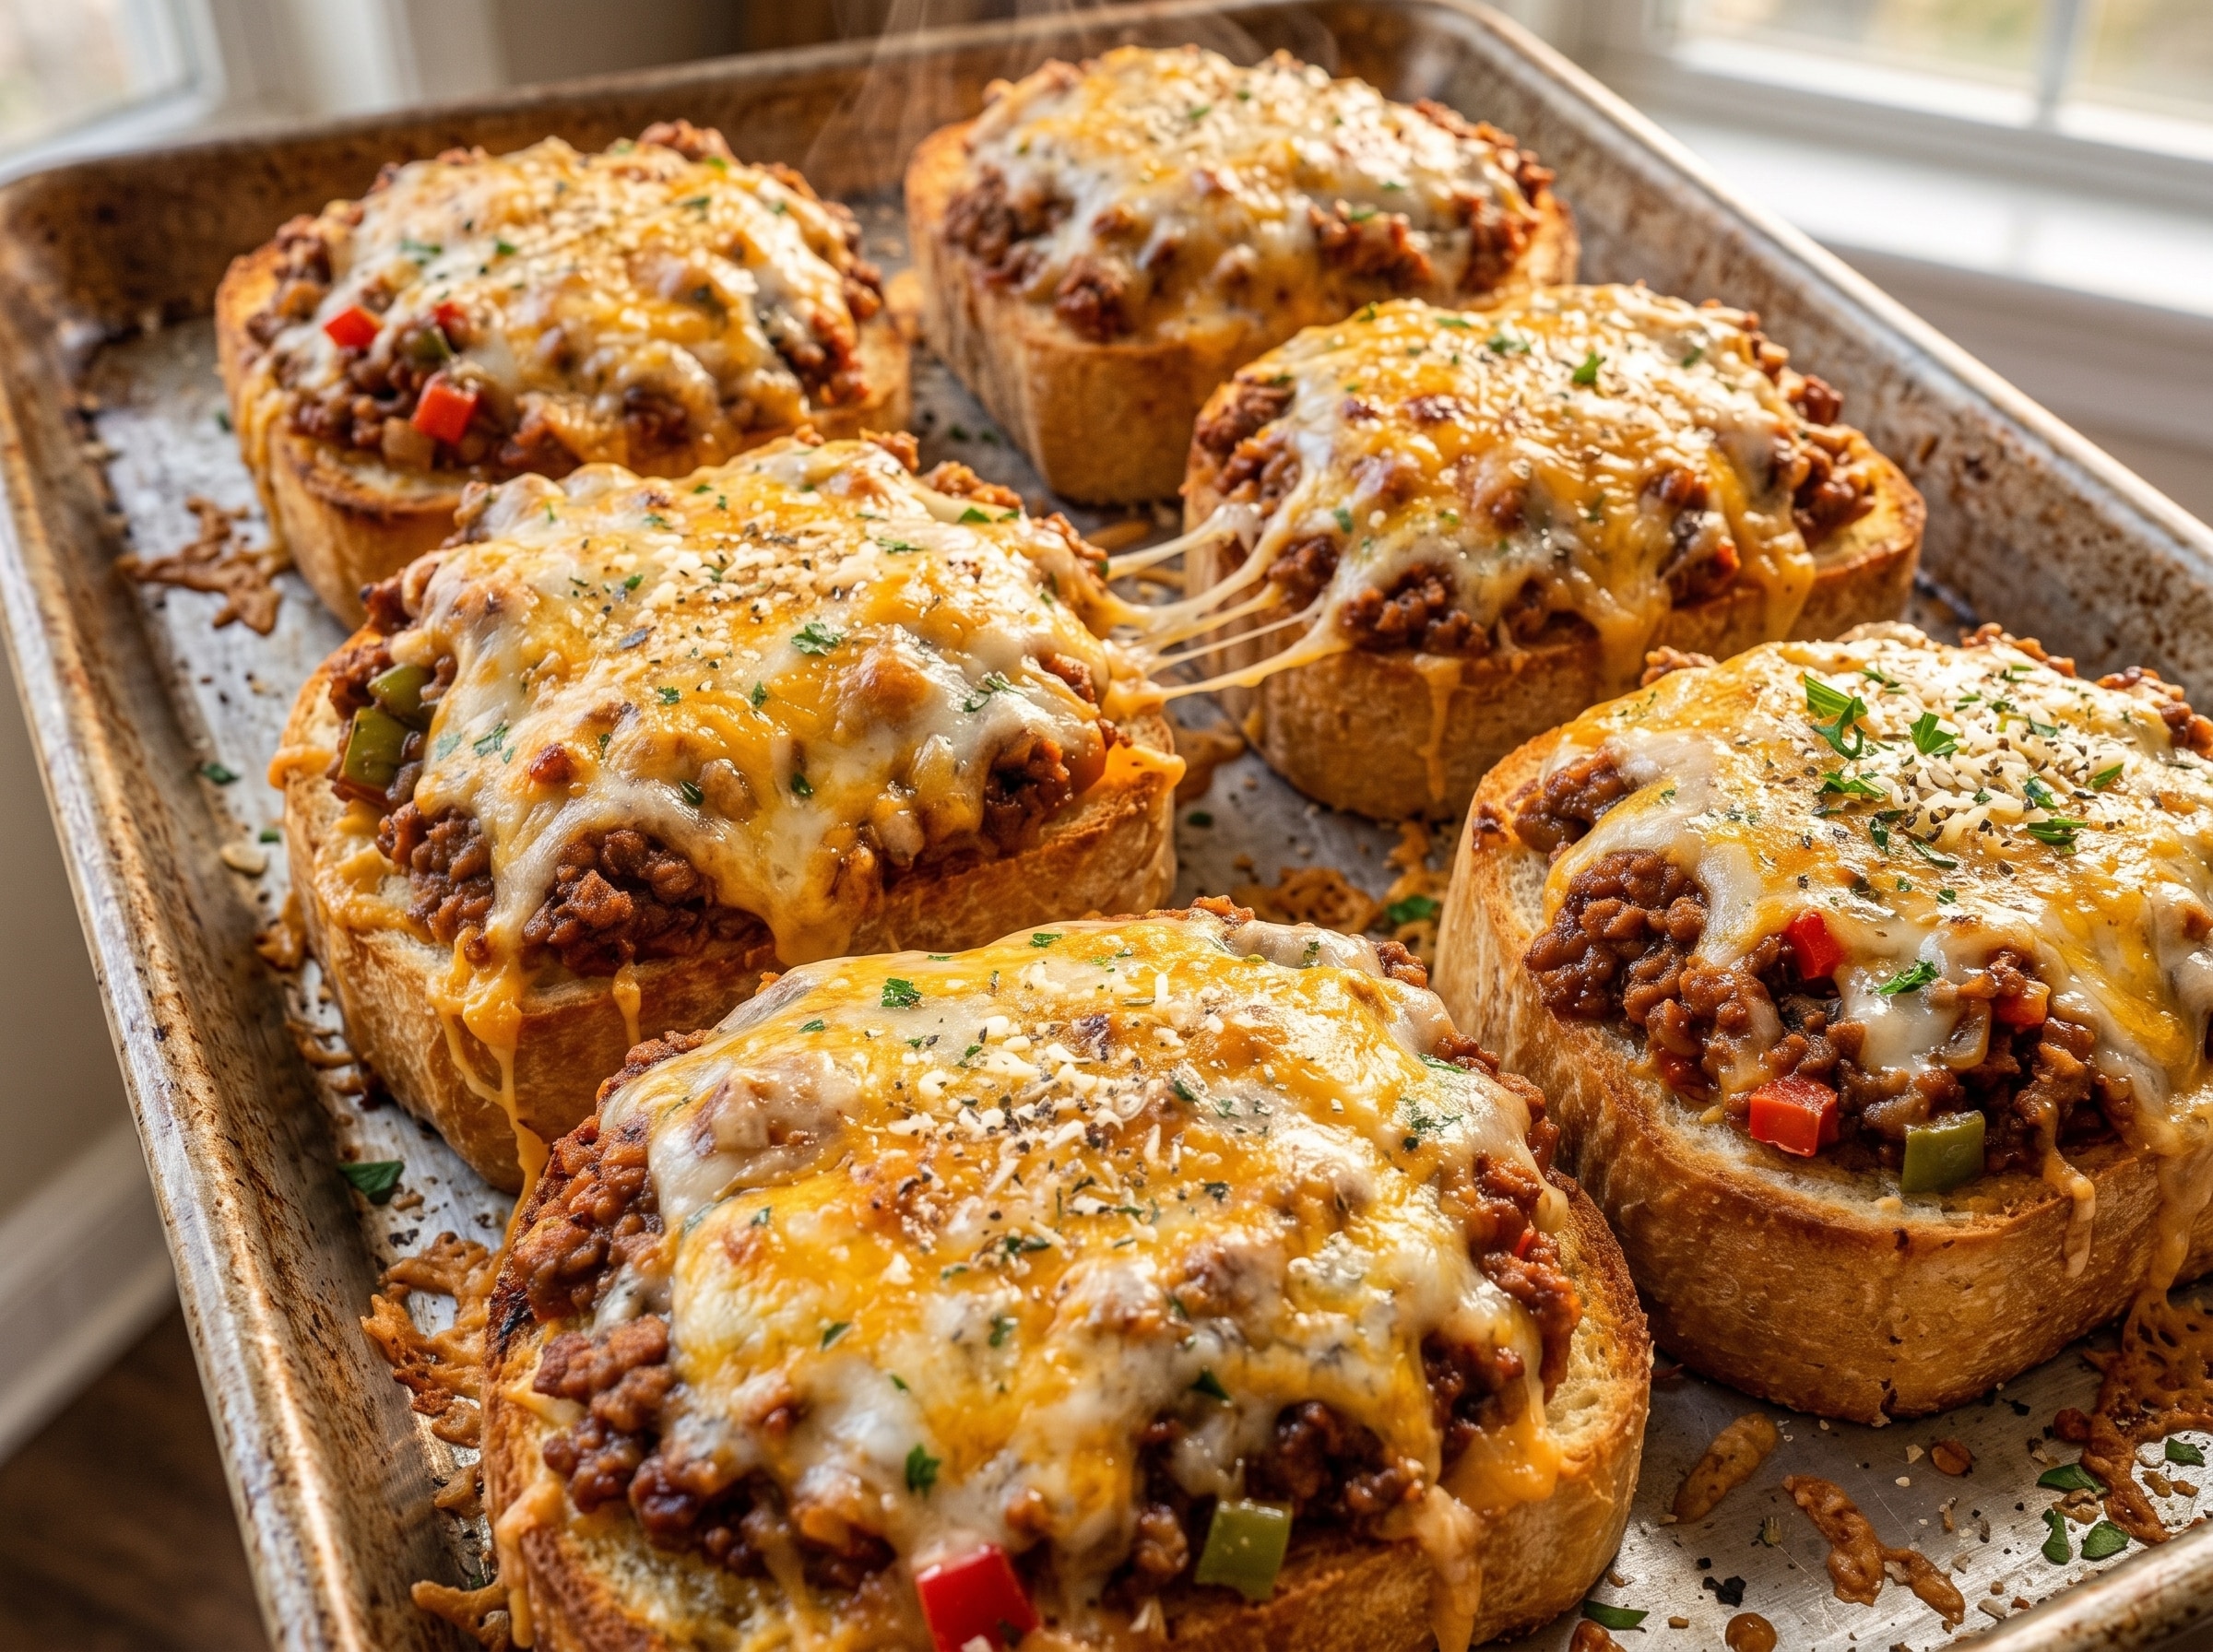
This dish is the glorious, unholy child of two all-time comforting heavyweight champions—classic ground beef Sloppy Joes and buttery, crispy, garlic-perfumed toast. It’s loud, it’s messy, it’s ridiculously cheesy, and it takes about as much actual culinary skill as boiling water. If you have a pan, a baker’s rack, and an appetite, congratulations: you’re fully qualified to make this absolute masterpiece tonight.
Grab your apron (or just an old T-shirt you don’t mind getting tomato sauce on), open a drink, and let’s get down to business.
Why This Recipe is Awesome
Let’s be honest for a second. Life is complicated. Tax forms are complicated. Modern dating is complicated. Dinner shouldn’t feel like a final exam in organic chemistry. Here’s why this recipe is about to become your new weeknight hyper-fixation:
- It’s basically idiot-proof: Seriously. If you can brown meat without setting your curtains on fire, you’re already 90% of the way to culinary glory. Even I didn’t mess this up, and I once accidentally burned water.
- Textural perfection: Soft, soggy burger buns are fine for middle school cafeterias, but we deserve better as functioning adults. Thick-cut garlic toast provides a sturdy, crunchy, buttery base that holds up under the mountain of meat without turning into mush.
- Cheese pull for days: We aren’t just sprinkling a pinch of shredded cheddar on top as a polite gesture. We’re burying this ground beef under a literal blanket of molten, bubbling cheese.
- Ready in 20 minutes: From “I’m starving” to “I’m in a glorious food coma on the couch,” you’re looking at twenty minutes max. That’s shorter than the time it takes to figure out what to watch on Netflix.
- Budget-friendly: You probably have half of these ingredients hiding in your pantry right now. Ground beef, garlic, bread, canned tomato sauce, cheese. No truffle oil or exotic spices required.
Ingredients You’ll Need
Here’s your shopping list. No obscure, expensive herbs harvested only on full moons—just straightforward, delicious goodness.
For the Garlic Toast Base:
- Thick-cut Texas Toast or French Bread (6–8 thick slices): Don’t bring thin, wimpy sandwich bread to this party. You need thick, sturdy slices that can carry the weight of your culinary choices.
- Unsalted Butter (½ cup, softened): Softened, not melted into a puddle! Leave it on the counter while you contemplate your life choices.
- Garlic (4 cloves, minced fine): Fresh garlic is best, but if you use the pre-minced jarred stuff because you’re tired, I won’t judge you. (Okay, I might judge you a little).
- Fresh Parsley (2 tbsp, finely chopped): Adds a nice pop of green so you can pretend this meal is a salad.
- Grated Parmesan Cheese (¼ cup): For that extra salty, nutty kick on the crust.
For the Sloppy Joe Filling:
- Lean Ground Beef (1 lb / 450g): 80/20 or 85/15 works best. Enough fat for real flavor, but not so much that you’re swimming in a grease lagoon.
- Yellow Onion (1 medium, diced small): Adds sweetness and crunch. Try not to cry while chopping it; save the tears for your bank account.
- Green Bell Pepper (1 small, finely diced): The classic Sloppy Joe staple. Adds color and a subtle crisp bite.
- Garlic Powder & Onion Powder (1 tsp each): Because double garlic is the only correct way to live.
- Tomato Sauce (1 cup / 8 oz canned): The rich base of our savory sauce.
- Ketchup (½ cup): Gives that signature sweet and tangy Sloppy Joe vibe we all loved as kids.
- Yellow Mustard or Dijon (1 tbsp): Adds a sharp little tang that cuts through the rich meat.
- Worcestershire Sauce (1 tbsp): Hard to pronounce, impossible to skip. It adds that deep, savory umami flavor.
- Brown Sugar (1 tbsp): Balances out the acidity of the tomatoes. Trust the process.
- Salt & Black Pepper (to taste): Don’t be timid with seasoning!
The Holy Cheese Topping:
- Shredded Mozzarella & Cheddar Blend (2 full cups): Mozzarella gives you the dramatic, Instagram-worthy cheese pull; Sharp Cheddar gives you that big, bold flavor punch.
Step-by-Step Instructions
Follow these easy steps and you’ll be eating like royalty in no time.
Step 1: Prep the Oven & Garlic Butter
Preheat your oven to 400°F (200°C). Line a large baking sheet with parchment paper or foil for easy cleanup later (you’ll thank me when you aren’t scrubbing cheese off metal at 10 PM).
In a small bowl, combine your softened butter, minced fresh garlic, chopped parsley, and grated Parmesan cheese. Mash it around with a fork until it forms a creamy, fragrant garlic spread.
Step 2: Toast the Bread (Round One)
Arrange your thick bread slices in a single layer on your prepared baking sheet. Generously slather the garlic butter mixture onto the top of every slice. Don’t be stingy—spread it all the way to the edges!
Pop the tray into the preheated oven for 6 to 8 minutes until the edges are light golden brown and the butter is fully melted and sizzling. Pull them out and set aside. Do not turn off the oven!
Step 3: Brown the Meat & Veggies
While your bread is getting toasted, set a large skillet over medium-high heat. Add your ground beef, diced yellow onion, and diced green bell pepper.
Break up the beef with a wooden spoon or meat masher as it cooks. Sauté for about 6 to 7 minutes until the beef is fully browned and the onions are soft and translucent. Drain off any excess grease from the pan so your toast doesn’t end up soggy.
Step 4: Build the Sloppy Sauce
Turn the heat down to medium-low. To your skillet of cooked beef and veggies, add the tomato sauce, ketchup, yellow mustard, Worcestershire sauce, brown sugar, garlic powder, onion powder, salt, and pepper.
Stir everything together thoroughly. Let it simmer gently for 5 minutes, stirring occasionally, until the sauce thickens up and coats the meat tightly. You want a rich, thick texture—if it’s too runny, it’ll ruin the toast! Taste it and adjust salt or sweetness if needed.
Step 5: Assemble the Masterpiece
Take your golden garlic toasts. Using a big spoon or ladle, pile a generous amount of the warm Sloppy Joe mixture right onto the center of each garlic toast slice. Push it slightly toward the edges, but leave a tiny border so you have something crispy to hold onto.
Step 6: Cover in Cheese & Melt!
Shed any restraint you have left and smother the top of each loaded toast slice with your shredded Mozzarella and Cheddar blend. Be generous—the cheese acts as the delicious glue holding this mountain together.
Return the tray to the oven and bake for another 5 to 7 minutes, or until the cheese is completely melted, bubbly, and starting to show gorgeous golden-brown spots.
(Optional Pro-Tip: Switch your oven to Broil for the last 60 seconds if you like extra crispy, blistered cheese on top, but WATCH IT CLOSELY so you don’t burn it!)
Step 7: Garnish & Devour
Gently transfer the garlic toasts to a platter. Sprinkle with a little extra fresh parsley or red pepper flakes if you’re feeling fancy. Serve hot while the cheese is pulling!
Common Mistakes to Avoid
Even though this recipe is incredibly straightforward, culinary tragedy can strike the unprepared. Avoid these rookie blunders:
- Skipping the initial bread toast: Throwing wet, hot meat sauce directly onto raw, soft bread is a express ticket to Soggy Town. Pre-toasting the garlic bread creates an impenetrable flavor shield that stays crispy underneath.
- Not draining the beef grease: Ground beef releases a lot of fat as it cooks. If you skip draining the skillet before adding your sauces, your Sloppy Joe filling will separate into a greasy puddle. Drain the pan, folks!
- Using paper-thin sandwich bread: Standard thin white bread simply cannot handle the sheer weight of ground beef and molten cheese. Go thick or go home. Texas Toast, thick French bread, or artisan sourdough are mandatory.
- Buying pre-shredded cheese in bags: Look, I know it’s convenient, but pre-shredded bag cheese is coated in anti-caking cellulose agents. It resists melting smoothly and gets oily. Grating your cheese from a block takes 2 minutes and yields a infinitely better, gooier cheese pull.
- Walking away during the broil phase: If you decide to broil your cheese at the end, do not leave the kitchen to check your phone. Broilers operate on demonic speed—one second your cheese is bubbling nicely, the next second your dinner is an charred pile of carbon.
Alternatives & Substitutions
Ran out of something? Don’t panic! Here are easy swaps that won’t ruin your dinner:
- Swap the Meat: Ground turkey or ground chicken work amazingly well if you want a lighter option. Just add a splash of olive oil to the pan since poultry has less natural fat. Want a vegetarian version? Swap the beef for canned lentils or cooked plant-based ground meat—it takes on the Sloppy Joe sauce flavor ridiculously well!
- Spice It Up: If you love heat, toss in half a diced jalapeño with your bell peppers, or add a few dashes of Sriracha / hot sauce directly into the tomato blend.
- Gluten-Free Option: Use your favorite thick gluten-free sturdy bread. Bake it a couple of minutes longer during the pre-toast phase to ensure it holds structural integrity.
- Change the Cheese: Pepper Jack cheese adds a fantastic kick. Provolone or Gouda give an unbelievably silky, smoky melt. Use whatever makes your heart happy!
FAQ (Frequently Asked Questions)
Can I use margarine instead of real butter for the garlic toast?
Well, technically yes, but why hurt your soul like that? Real butter gives you that golden, rich flavor that margarine just can’t match. If margarine is all you’ve got, go for it, but real butter reigns supreme IMO.
Can I make the Sloppy Joe filling ahead of time?
100% yes! In fact, the meat mixture tastes even better the next day after all the spices and tomato goodness have had time to hang out in the fridge. Cook the meat filling, store it in an airtight container for up to 3 days, and just reheat it before spooning it onto fresh garlic toast and baking.
Help! My sauce turned out way too runny! What do I do?
Don’t panic! Just keep simmering the meat mixture over medium heat for an extra 3–5 minutes so the excess liquid evaporates. If you’re in a super rush, stir in a tiny slurry of 1 tsp cornstarch mixed with 1 tbsp cold water—it’ll thicken up in seconds.
Can I freeze leftover Cheesy Sloppy Joe Garlic Toasts?
You can freeze the cooked Sloppy Joe meat filling effortlessly for up to 3 months! However, I don’t recommend freezing fully assembled garlic toast—the bread will lose its delightful crunch upon thawing. Keep the meat frozen, then make fresh garlic toast when craving hits!
What sides go well with this?
Since this meal is delightfully rich and satisfying, pair it with a crisp green garden salad, simple steamed broccoli, or classic potato chips. Or just double down on comfort food and serve it alongside crispy french fries or onion rings. We don’t judge here.
Final Thoughts
There you have it—the ultimate comfort food upgrade that turns basic weeknight ingredients into an absolute feast. It’s crispy, cheesy, savory, and so satisfying you’ll probably find yourself making it at least once a week from now on.
Now go impress someone—or just treat yourself—with your new culinary skills. You’ve definitely earned it! Bon appétit!
